
Imagine spreading homemade strawberry jam on your toast. You made it yourself with just a few ingredients. This recipe needs 5 cups of fresh strawberries, 1 cup of sugar, and 2 tablespoons of lemon juice.
This easy recipe is great for topping toast, yogurt, or filling cakes and pastries. You’ll get about 1.25 cups of jam. Enjoy it for up to 6 months in the fridge or over 1 year in the freezer.
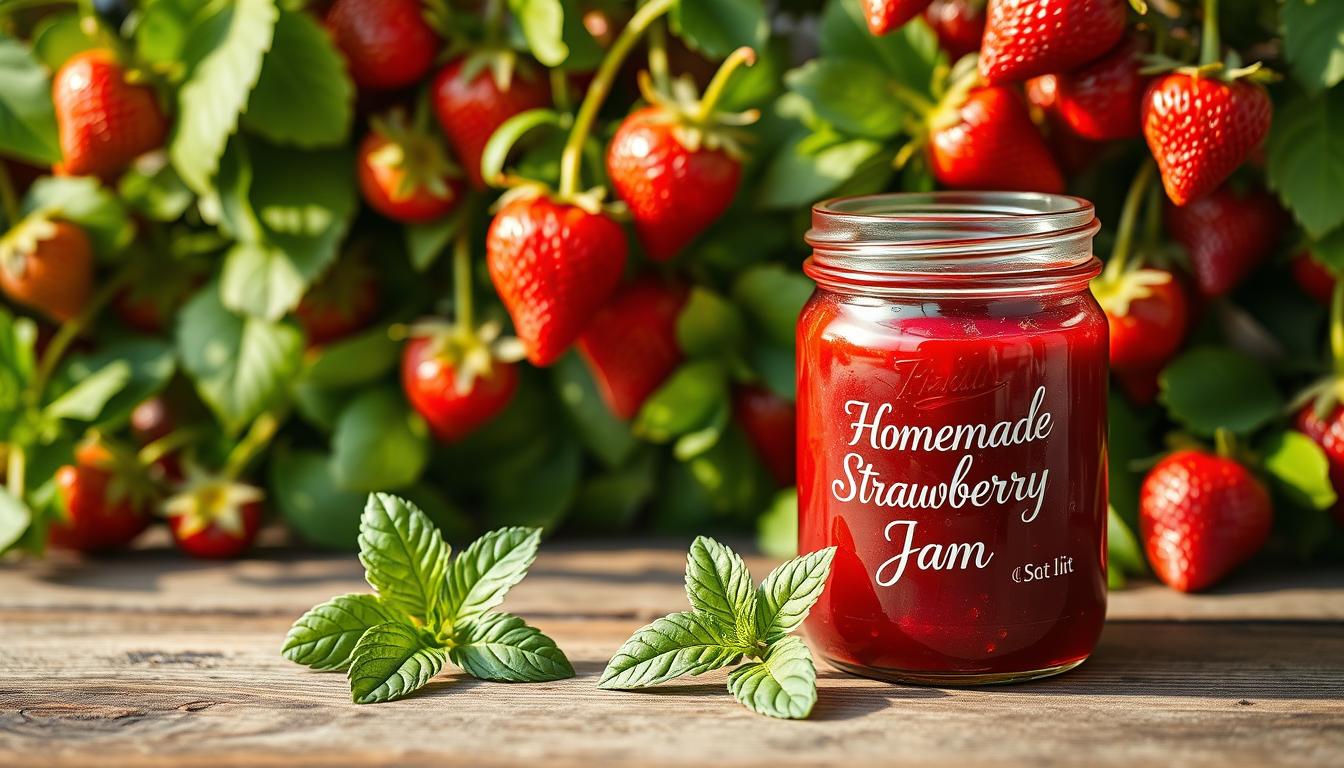
To start, check out a website like homemade strawberry jam recipe. You can control the ingredients and sweetness. It’s a healthier choice than store-bought jam.
Why Make Your Own Strawberry Jam at Home
Making your own strawberry jam at home is fun and rewarding. You only need a few ingredients and basic tools. This way, you can make a delicious, healthy jam that suits your taste.
One big plus is controlling the sugar and ingredients. This lets you make a quick strawberry jam just right for you.
Homemade jam is also good for your wallet. Using fresh strawberries and basic ingredients, you can make a tasty easy strawberry jam. It’s cheaper than store-bought and ready in just 20 minutes.

- Control over ingredients and sugar content
- Cost savings compared to store-bought options
- Ability to create a unique and delicious flavor profile
By making your own strawberry jam, you get a healthy, tasty treat. You also save money and have fun doing it. Whether you want a quick strawberry jam or a traditional easy strawberry jam, making it at home is a great choice.
Essential Equipment for Jam Making
To make tasty homemade strawberry jam, you’ll need some key tools. You’ll need a heavy-bottomed saucepan, a candy thermometer, and a jar for storing the jam. The heavy-bottomed saucepan helps cook the jam evenly, preventing it from burning.
A candy thermometer is vital for checking the jam’s temperature. It makes sure the jam reaches the right temperature for setting. This is key for making traditional strawberry jam.
Other important tools for jam making are:
- Digital measuring scales for accurate ingredient measurements
- A ladle with a spout for pouring jam into smaller jars
- A standalone timer to track jam-making intervals
- Decorative labels for identifying the contents and date of the jam

Having a large, heavy mixing bowl is also important. It keeps the bowl steady during mixing. Optional tools like stone removers and jar lifters can make jam-making safer and better. With the right equipment, you can make delicious homemade strawberry jam. It’s great for topping toast, yogurt, or as a filling for cakes and pastries.
Ingredients for Perfect Strawberry Jam Recipe
To make a delicious fresh strawberry jam, you’ll need just a few simple ingredients. The key to a great jam is using the best strawberries you can find. Look for strawberries that are thoroughly red with few blemishes, as these will provide the best flavor and texture for your jam.
When making a simple strawberry jam recipe, it’s essential to choose the right sugar and additives. Granulated sugar is a popular choice, but you can also experiment with other types of sugar or sweeteners to find the flavor you like best. Optional additives, such as pectin, can help the jam set, but they’re not necessary if you’re using a traditional recipe.

Choosing the Best Strawberries
Fresh strawberries are the star of the show when it comes to making homemade strawberry jam. You’ll want to choose strawberries that are sweet and flavorful, as these will provide the best taste for your jam. Consider using organic strawberries, as they tend to have fewer pesticides and better flavor.
Sugar Types and Alternatives
Granulated sugar is a classic choice for making strawberry jam, but you can also experiment with other types of sugar or sweeteners. Some popular alternatives include honey, maple syrup, or agave nectar. Keep in mind that using a different sweetener may affect the flavor and texture of your jam.
Optional Additives and Pectin
Optional additives, such as pectin, can help the jam set and give it a more traditional texture. But, if you’re using a traditional recipe, you may not need to add any pectin at all. Consider experimenting with different additives to find the flavor and texture you like best.
Preparing Your Strawberries
To make a tasty strawberry jam recipe, start by preparing your strawberries. You’ll need to hull and slice them, and remove any stems or leaves. About 1 quart of fresh strawberries is needed for a standard recipe. This step is key to making homemade strawberry jam smooth and even.
Here’s how to prepare your strawberries:
- Hull the strawberries, removing the green tops.
- Remove any stems or leaves.
- Slice the strawberries to release their juice.

By following these steps, you can make a delicious homemade strawberry jam. Use a simple recipe for great results. Always choose fresh, high-quality ingredients for the best flavor.
Step-by-Step Traditional Strawberry Jam Process
Making traditional strawberry jam is easy. First, mash and cook the strawberries. Then, test if it’s set right. Lastly, clean your tools. This method is simple and needs just a few things, making it perfect for beginners.
Here are the steps to make traditional strawberry jam:
- Mash and cook the strawberries in a heavy-bottomed saucepan, gradually increasing the heat to bring the mixture to a boil.
- Test for the setting point using a candy thermometer, aiming for a temperature of 105 Degrees C (220 F).
- Sterilize the equipment, including the jars and lids, to prevent contamination and ensure the jam is shelf-stable.
By following these steps, you can make a tasty traditional strawberry jam. It’s great on toast, yogurt, or in cakes and pastries. This jam is sweet and tangy, made with fresh strawberries and a bit of sugar.
The traditional strawberry jam recipe uses fresh strawberries, sugar, and lemon juice. It makes 8 cups of jam, perfect for 8-ounce jars. This recipe is easy to follow, making it a great choice for homemade jam.
Quick No-Pectin Jam Method
To make a quick and easy strawberry jam, you can use a no-pectin method. This method cooks the strawberries with sugar and lemon juice. It’s great for those in a hurry, as it makes a tasty jam in about 20 minutes.
The recipe needs 16 oz of strawberries, 3/4 cup of sugar, and 2 tablespoons of lemon juice. You can change the sugar amount to your liking. But remember, less sugar means the jam might spoil faster. The jam is ready when it hits 217°F to 220°F.
Here are some tips for making quick strawberry jam without pectin:
- Cook the mix for 10-15 minutes, until it hits the target temperature.
- Use a candy thermometer to check the temperature.
- Let the jam cool before putting it in a jar or container.
By following these easy steps, you can make a tasty easy strawberry jam at home. You don’t need pectin or special tools. This quick strawberry jam recipe is great for topping toast, yogurt, or as a filling for cakes and pastries.
Tips for Achieving the Perfect Consistency
Making homemade strawberry jam can be tricky. You want it smooth and spreadable, but not too runny or thick. Understanding the sugar to water ratio and pectin is key to getting it right.
Cooking time is very important. Too long makes the jam thick and sticky. Cooking too short makes it runny. Aim for a 20-minute cooking time, but this can change based on your pot and stove.
Common Setting Problems
Problems like runny or thick jam are common. To fix these, adjust the cooking time or sugar amount. If it’s too runny, cook it longer or add more sugar. If it’s too thick, add water or cook it less.
Texture Troubleshooting
Texture issues, like chunky or smooth jam, can happen too. To fix these, change how much you mash or blend. For chunky jam, blend a bit longer. For smooth jam, add more fruit or blend less.
Low-Sugar Variations for Healthier Options
When making your own strawberry jam, you can play with sugar levels. For a healthier option, use less sugar or try honey or maple syrup. This way, you get the sweet taste of fresh jam without too much sugar.
A low-sugar jam recipe makes about 8 half-pint jars. Each 2-tablespoon serving has only 18 calories and 4 grams of sugar. You’ll need 1 cup of sugar, 6 tablespoons of pectin, and 1/4 cup of water. Adding fresh lemon juice can also boost the flavor and preserve the jam.
- Control over the amount of sugar used
- Ability to use alternative sweeteners like honey or maple syrup
- Lower calorie and sugar content per serving
- Fresh and tangy flavor of strawberries without added preservatives
By making your own low-sugar jam, you can enjoy fresh strawberries’ taste while watching your sugar intake. So, why not try it and find your ideal sugar balance?
Proper Storage and Shelf Life
Storing your homemade strawberry jam right is key to keeping it fresh and safe. You put a lot of effort into making it. So, it’s important to store it well. Keep it in a cool, dark spot, away from sunlight and heat.
Using clean, airtight glass jars is vital. It helps keep the jam fresh and stops bacteria. Watch out for mold, bad smells, or odd looks. Storing it right lets you enjoy it longer. Homemade strawberry jam can last up to a year or more with proper canning.
- Unopened jars can stay fresh for a year or more if stored right.
- Opened jars last about a month in the fridge.
- Freezer jam stays good for up to a year in freezer-safe containers.
By following these tips, you can enjoy your homemade strawberry jam for a long time. Share it with your loved ones. Always check for spoilage before eating.
Creative Ways to Use Your Homemade Jam
Now that you’ve made your own strawberry jam recipe, it’s time to get creative. Your homemade strawberry jam can be used in many tasty ways. Try it as a topping for yogurt or oatmeal, or as a filling for cakes and pastries.
Here are some ideas to get you started:
- Use your homemade strawberry jam as a topping for ice cream or cheesecake
- Make a strawberry jam recipe for jam tarts or turnovers
- Use it as a filling for cookies or cakes
With your homemade strawberry jam, the possibilities are endless. You can make jam ‘n’ cream French toast, berry-filled doughnuts, or even use it as a topping for pancakes or waffles. So get creative and enjoy your delicious strawberry jam recipe!
Seasonal Tips for Year-Round Jam Making
Traditional strawberry jam doesn’t have to be seasonal. With a simple recipe, you can enjoy it all year. Frozen strawberries keep their flavor and freshness, making it possible to make jam when strawberries are not in season.
For more tips, check out food52.com. You can also try different fruits like blueberries or raspberries for new tastes.
Here are some key points for making jam all year:
- Use frozen strawberries for out-of-season jam making
- Adjust the recipe for different types of fruit
- Consider using an 8-quart pot for even heat distribution
Follow these tips and use a simple strawberry jam recipe to enjoy your favorite jam all year. Whether you’re new or experienced, quality ingredients and tools like All-Clad’s D3® Stainless 8-Quart Stockpot are key to success.
Troubleshooting Common Issues
When making homemade strawberry jam, you might face some common problems. These can be frustrating but usually have simple fixes. Knowing how to tackle issues like color, texture, and setting is key. This is even more important when making low sugar strawberry jam.
Getting the right consistency is critical. If your jam is too runny, it won’t set right. On the other hand, jam that’s too thick is hard to spread. To fix texture issues, try adjusting how much you mash or blend the strawberries. Adding a bit more pectin can also help the jam set. Finding the right balance between sugar and pectin is essential, even more so for low sugar jam.
Color preservation is another common problem. To keep the strawberries’ natural color, use more strawberries than sugar. This approach enhances the flavor and color of your homemade jam. By following these tips, you can make a delicious, healthy jam, whether it’s traditional or low sugar.
Common Issues and Solutions
- Color preservation: Use a higher ratio of strawberries to sugar
- Texture problems: Adjust the amount of mashing or blending, or add more pectin
- Setting difficulties: Adjust the cooking time or the amount of sugar used
Understanding how to solve common problems can help you make a tasty, healthy homemade strawberry jam. This includes a delicious low sugar strawberry jam that you’ll enjoy all year.
Safety Precautions and Best Practices
When making homemade strawberry jam, it’s important to follow safety steps. This ensures the jam is safe to eat and the equipment is clean. You should sterilize your tools, follow canning steps, and store the jam in a cool, dark spot. The water bath canning method works well for traditional strawberry jam.
Understanding canning methods is key. Hot water bath canning is best for foods like jams and pickles. Pressure cooker canning is needed for foods like asparagus. For homemade strawberry jam, hot water bath canning is the best choice.
Here are some important canning tips:
- Use new center lids for each canning session
- Reuse jars and screw-on bands
- Keep a rolling boil for 1 to 1.5 minutes during jam-making
- Leave a 1/4 inch headspace when filling jars
- Process jars in a water bath for 10 minutes
By following these tips, you can enjoy your traditional strawberry jam safely. Always use a wide pot for better flavor. Also, try overnight maceration of fruit with sugar for the best taste.
With these guidelines, you’ll make delicious and safe homemade strawberry jam. You can enjoy it all year long.
FAQ
Q: What is the best strawberry jam recipe to make at home?
A: The best strawberry jam recipe is one that is easy to make and tastes delicious. This homemade strawberry jam recipe is a classic and is loved by many. It uses fresh strawberries, sugar, lemon juice, and pectin to create a sweet and tangy jam.
Q: How do I make homemade strawberry jam?
A: To make homemade strawberry jam, start by washing and hulling the strawberries. Then, mash them in a bowl until they are well crushed. In a separate saucepan, combine the sugar, lemon juice, and pectin. Heat the mixture until the sugar dissolves and the pectin is fully incorporated. Add the crushed strawberries to the saucepan and bring the mixture to a boil. Reduce the heat and simmer for about 10-15 minutes, or until the jam has thickened and passed the “wrinkle test”.
Q: What is the wrinkle test for homemade jam?
A: The wrinkle test is a simple way to check if your homemade jam has thickened properly. To perform the wrinkle test, place a small spoonful of the jam on a chilled plate. Let it cool for a few seconds, then gently push the jam with your finger. If the jam wrinkles and holds its shape, it has reached the desired consistency and is ready to be canned or stored.
Q: How do I can homemade strawberry jam?
A: To can homemade strawberry jam, follow these steps: Sterilize your jars and lids by washing them in hot soapy water and then rinsing them thoroughly. Fill the hot, sterilized jars with the homemade strawberry jam, leaving about 1/4 inch of space at the top. Wipe the rim of the jar with a clean cloth to remove any excess jam. Place the sterilized lids on the jars and screw on the rings until they are just finger-tight. Place the jars in a boiling water bath for 5-10 minutes to ensure proper sterilization and sealing. Remove the jars from the water bath and let them cool completely. Check the seals by pressing on the top of the lid. If the lid does not move and the seal is tight, the jam is properly canned and can be stored in a cool, dark place for up to 12 months.
Q: Can I store homemade strawberry jam in the fridge?
A: Yes, you can store homemade strawberry jam in the fridge. Simply transfer the cooled jam to an airtight container, such as a glass jar with a tight-fitting lid. Store the jam in the refrigerator for up to 6 months. Note that homemade jam will not have the same shelf life as store-bought jam, which has been sterilized and canned.
Q: What are some tips for making homemade strawberry jam?
A: Here are some tips for making homemade strawberry jam: Use fresh, ripe strawberries for the best flavor. Wash and hull the strawberries before crushing them. Use a high-quality pectin to ensure proper thickening. Sterilize your jars and lids properly to ensure proper sealing. Follow the recommended canning time to ensure proper sterilization and sealing. Store the homemade jam in a cool, dark place for up to 12 months.