
Imagine a sunny summer afternoon with kids laughing in your backyard. The air is filled with excitement for a special treat. That’s what a Dirt Cake Recipe brings. It’s a fun, easy dessert that everyone loves.
This no-bake cake has layers of crushed Oreos and creamy fillings. It looks fun and tastes amazing. Plus, it’s really easy to make.
Homemade dirt cake has been a favorite for decades. It’s a mix of chocolate pudding, cream cheese, and Oreo crumbs. The result is a dessert that’s both tasty and fun.
Adding gummy worms on top makes it even more special. It turns every bite into a fun adventure.
Whether you’re making it for the first time or sharing it with your family, this recipe is all about fun. It’s a chance to be creative and enjoy a classic dessert.
Introduction to Dirt Cake
Dirt Cake is a fun dessert that looks like soil. It’s loved by both kids and adults. It’s made with crushed chocolate sandwich cookies, like Oreo cookies, and creamy fillings like chocolate pudding and whipped topping. The recipe is perfect for parties and family gatherings.
What is Dirt Cake?
A classic dirt cake is more than a dessert. It’s a sweet trick that looks like soil but tastes amazing. It has layers of crushed Oreos and creamy mixtures like instant pudding and whipped topping. It’s often decorated with gummy worms and served in a flower pot for fun.
History of Dirt Cake
The classic dirt cake started in the American Midwest. It was a time when creativity in cooking was celebrated. Over the years, it evolved into chocolate dirt cake and oreo dirt cake, becoming a favorite in many homes.
Why You’ll Love This Recipe
This kid-friendly dirt cake is loved for its fun look and easy making. It only takes about 45 minutes to prepare. You can make it a day ahead, which is great for parties. It’s also easy to make more or less, depending on your needs. Its high rating shows it’s a hit with many.

| Serving Size | 160 grams |
|---|---|
| Total Calories per Serving | 343 |
| Calories from Fat | 159 (46% of total calories) |
| Total Fat per Serving | 17.7 grams (24% of daily value) |
| Saturated Fat per Serving | 8.1 grams (40% of daily value) |
| Cholesterol per Serving | 22.8 milligrams (7% of daily value) |
| Sodium per Serving | 382.7 milligrams (13% of daily value) |
| Potassium per Serving | 212.1 milligrams (6% of daily value) |
| Total Carbohydrates per Serving | 42.5 grams (13% of daily value) |
| Dietary Fiber per Serving | 1.4 grams (5% of daily value) |
| Sugars per Serving | 41.2 grams |
| Protein per Serving | 5.3 grams (8% of daily value) |
Make it for a birthday, a casual party, or just to enjoy a nostalgic treat. This dirt cake recipe is sure to please everyone.
Ingredients Needed for Dirt Cake
To make a delicious dirt cake, you need some key ingredients. They mix together to give a rich and creamy taste. This recipe is easy to follow and perfect for any event.
Essential Ingredients
Here are the must-haves for a classic dirt cake:
- 30 crushed Oreos (about 1-1/3 cups)
- 2 packages of instant vanilla pudding mix (each 3.4 oz)
- 3.5 cups of whole milk
- 8 ounces of cream cheese, softened
- 1/2 cup of salted butter, softened
- 1/2 cup of powdered sugar
- 8 ounces of frozen whipped topping, thawed
- 1 teaspoon of vanilla extract
These ingredients are key to getting the dirt cake’s unique taste and texture.

Optional Ingredients and Add-ins
Want to try something new? Here are some optional ingredients and add-ins:
- Different pudding flavors, like chocolate or butterscotch
- Fresh fruits like raspberries or strawberries
- Crushed nuts such as pecans or almonds
- Colorful sprinkles for a festive look
Adding these extras lets you make your dirt cake your own. It’s a great way to make it special for any occasion.
Kitchen Tools Required
To make a classic Dirt Cake, you need the right tools. These tools help you make this no-bake dessert smoothly and efficiently. We’ll cover the essential tools, from crushing cookies to mixing ingredients.
Food Processor
The food processor is key for no-bake desserts. It crushes chocolate sandwich cookies into a fine texture, like soil. This texture is perfect for the Dirt Cake layers. Using a food processor saves time and ensures the cookie crumbs are consistent.
Mixing Bowls and Spatula
You’ll need mixing bowls of different sizes and a strong spatula for Dirt Cake. These tools help mix ingredients, like cream cheese and powdered sugar. They also help fold in whipped topping for a smooth filling.
Having multiple mixing bowls helps keep ingredients separate until layering. A spatula makes scraping down bowl sides easy, ensuring all ingredients mix well.
Make sure you have the right tools for a smooth prep process. Check out this simple no-bake recipe to see how proper tools work.

| Tool | Purpose | Efficiency |
|---|---|---|
| Food Processor | Crushing cookies | High |
| Mixing Bowls | Combining ingredients | Medium |
| Spatula | Scraping and mixing | High |
Having the right tools is key for a perfect Dirt Cake. These tools make the process smooth and fun. Plus, they’re great for making the dessert in a 9×13-inch ungreased pan.
How to Make the Oreo Crust
Making the perfect Oreo crust is the first step to a delicious dirt cake. It’s easy to make with crushed Oreos and melted butter.
Step-by-Step Instructions
- Begin by putting 36 regular Oreos in a food processor. Pulse until they’re fine crumbs. It’s important to get them finely ground for a smooth crust.
- Melt 3 tablespoons of salted butter in a microwave-safe bowl. Mix the melted butter into the Oreo crumbs. Make sure the butter is spread evenly.
- Press the mix into the bottom of a 9×13-inch baking dish. Use a glass or measuring cup to press it down evenly.
- Chill the Oreo crust in the fridge for at least 10 minutes. This step helps it set, making it easier to add layers.

Tips for the Perfect Crust
- Make sure the melted butter is mixed well into the Oreo crumbs. This prevents dry spots.
- Use whole Oreos, including the cream filling, for more flavor.
- Press the crust mix firmly and evenly. This helps it stay solid and prevents crumbling.
- Chill the crust well before adding the pudding and cream cheese layers. This is key for a strong base.
Follow these tips for a perfect Oreo crust. It only takes 20 minutes to prepare and a little patience for chilling. Your crust will be ready to support a tasty, no-bake dessert.
Preparing the Pudding Mixture
Making the perfect pudding mixture is key to a great Dirt Cake. You want it to be creamy and full of flavor. This means choosing the right ingredients and mixing them just right.
Ingredients for the Pudding
Here’s what you need for the pudding layer:
- 3½ cups of whole milk
- 6.8 ounces of Jello instant French vanilla pudding (two 3.4 oz packages)
Choose top-notch instant pudding for a smooth mix. The whole milk adds a rich texture, making the pudding perfect for Dirt Cake.
Mixing the Pudding
Make sure to mix your pudding well to avoid lumps. Here’s how:
- In a big mixing bowl, mix the pudding mix and milk together.
- Use a whisk or an electric mixer on low speed to beat for about 2 minutes.
- Check if it’s smooth and starting to thicken.
- Let it sit for 5 minutes to set fully.
After preparing the pudding, it’s time to add it to your Dirt Cake. The creamy pudding adds a rich taste and feel to the dessert.
Making the Cream Cheese Mixture
To make the cream cheese mixture for Dirt Cake, start by softening the cream cheese. This makes the creamy layer dessert smooth and perfect. Leave the 8-ounce cream cheese at room temperature for 30 minutes.
Smoothing the Cream Cheese
Beat the softened cream cheese with an electric mixer until it’s smooth. This step is key to avoid lumps in your creamy layer dessert. You can also add a quarter cup of unsalted butter for extra smoothness.
Combining with Powdered Sugar and Whipped Topping
Then, mix ⅔ cup of powdered sugar into the cream cheese. Start mixing slowly to avoid a mess. After the sugar is fully mixed, gently fold in 8-ounces of thawed whipped topping. This keeps the mixture light and airy, making a great base for your cream cheese mixture for Dirt Cake.
Layering the Dirt Cake
Layering Dirt Cake is key to making this treat. Start with a solid Oreo crust at the base. Then, alternate layers of pudding and cream cheese mixtures. This method ensures even distribution, improving both looks and taste.
Building the Layers
First, spread 1-1/3 cups of crushed Oreos on the bottom of a 9×13 inch baking dish. Next, add half of the pudding mixture over the Oreo crust. Make sure it’s spread smoothly.
Then, layer half of the cream cheese mixture over the pudding. Repeat with the remaining pudding and cream cheese mixtures. Finish with another 1-1/3 cups of crushed Oreos on top.
Ensuring Even Distribution
To get even layers, smooth each layer with a spatula carefully. This prevents uneven stacking and gaps. Make sure each layer covers the entire surface evenly.
Using the right amounts of each component is important. It helps keep balance in every bite.
| Nutritional Information (per serving) | Amount |
|---|---|
| Calories | 232 kcal |
| Carbohydrates | 26 g |
| Protein | 4 g |
| Fat | 13 g |
| Saturated Fat | 7 g |
| Polyunsaturated Fat | 1 g |
| Monounsaturated Fat | 4 g |
| Trans Fat | 0.01 g |
| Cholesterol | 18 mg |
| Sodium | 177 mg |
| Potassium | 145 mg |
| Fiber | 1 g |
| Sugar | 17 g |
| Vitamin A | 251 IU |
| Calcium | 67 mg |
| Iron | 3 mg |
Adding the Final Touches
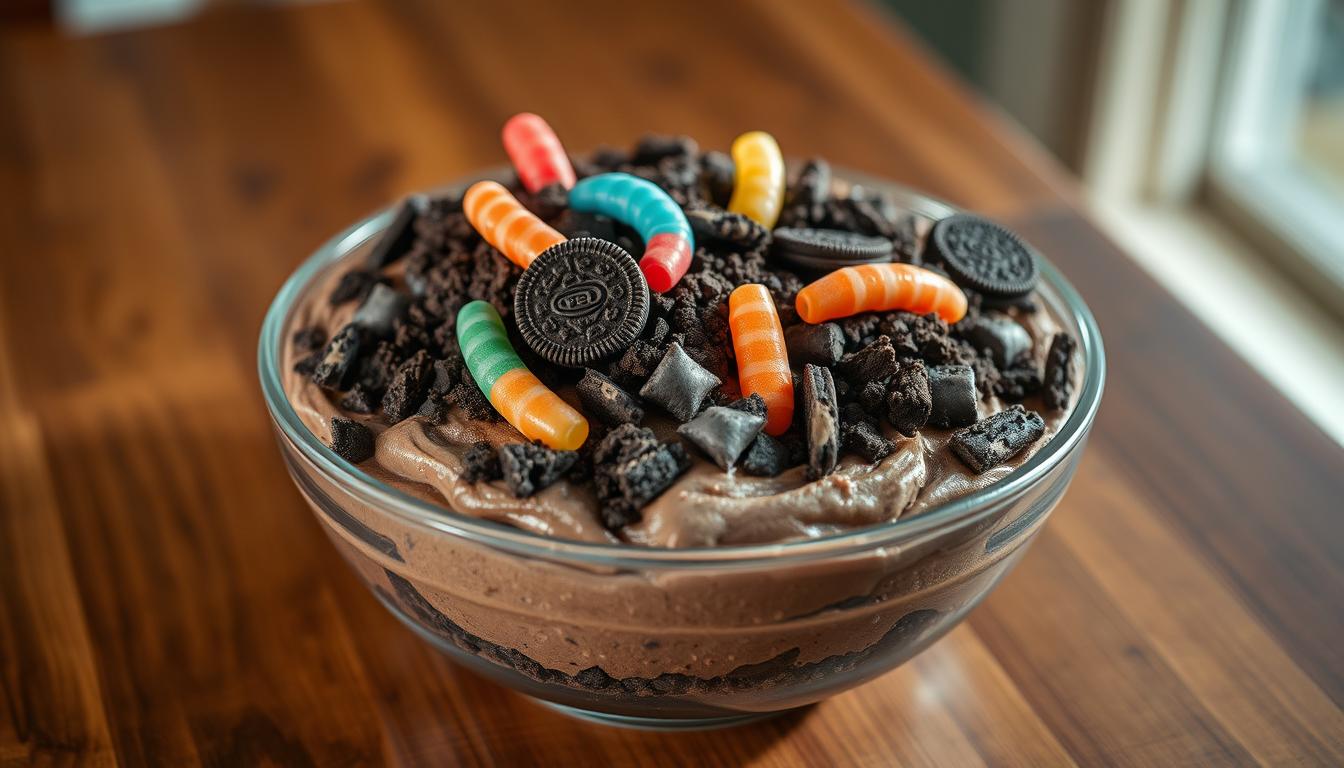
Now that your Dirt Cake is ready, it’s time to add the finishing touches for Dirt Cake. This will give it a real and fun look. Use decorative dessert toppings like crushed Oreos and gummy worms to make it stand out.
Crushed Oreos
To get the ‘dirt’ look, sprinkle crushed Oreos on top. You’ll need about 24 Oreo cookies, crushed finely. This adds a nice crunch and texture to the dessert. Make sure to crush them evenly for a perfect dirt effect.
Gummy Worms and Other Fun Toppings
No Dirt Cake is complete without gummy worms. They add color and a fun, chewy texture that kids love. Spread about 1/2 cup of gummy worms on top. You can also add candy rocks, chocolate shavings, or edible flowers for different occasions.
With these finishing touches for Dirt Cake, your dessert will be a hit. The crushed Oreos and gummy worms make it visually appealing and exciting. For more details and tips, check out the complete recipe here.
| Nutritional Information | Amount per Serving |
|---|---|
| Total Calories | 174 kcal |
| Carbohydrates | 20 g |
| Protein | 2 g |
| Fat | 10 g |
| Saturated Fat | 6 g |
| Cholesterol | 28 mg |
| Sodium | 89 mg |
| Potassium | 97 mg |
| Total Sugar | 20 g |
| Vitamin A | 336 IU |
| Calcium | 78 mg |
| Iron | 0.1 mg |
Dirt Cake Recipe Variations
Dirt cakes are incredibly versatile. You can make a chocolate lover’s dream or a healthier version with fruits and nuts. Here are some Dirt Cake variations to inspire your next custom recipe.
Chocolate Pudding Variation
Chocolate lovers will adore using chocolate pudding instead of vanilla. This Dirt Cake variation is richer and more decadent, looking like real dirt. Layer chocolate sandwich cookies with chocolate cake for a trifle-like dessert.
For a creative twist, add mint OREOs. They bring a refreshing touch to the mix.
Fresh Fruit and Nuts
For a healthier option, add fresh fruits and nuts. Fruits like strawberries, blueberries, and raspberries are great choices. Nuts like almonds or walnuts add a nice crunch.
This custom dirt cake recipe is perfect for those with dietary restrictions. It’s also a healthier treat option.
Decorating Your Dirt Cake
Making a dirt cake is fun and exciting. Decorating it can make your dessert even more special. It’s perfect for kids’ parties, themed gatherings, or cozy holiday treats. Customizing your dirt cake adds that extra flair everyone loves.
Themed Decorations for Different Occasions
Choose themed decorations for any occasion. For Halloween, use cookie tombstones and candy ghosts for a spooky graveyard. Spring celebrations can be brightened with fresh edible flowers and vibrant gummy insects.
These themes add different textures and colors. They make decorating dirt cake a fun and delightful activity.
Using Edible Flowers and Cake Toppers
Edible flowers like violets, pansies, and marigolds add elegance to your dirt cake. They bring color and beauty. Make sure the flowers are safe to eat and free of pesticides.
Cake toppers, whether personalized or from your favorite store, add more creativity. They can be birthday numbers or holiday-themed designs. This makes decorating versatile and fun.
With careful decorating, your dessert will taste great and look stunning. It will match your celebration’s theme perfectly. Get creative and turn your dirt cake into a masterpiece that will amaze your guests!
Serving Suggestions for Dirt Cake
The fun doesn’t stop at making the dirt cake. How you serve it can make it even more special. You can serve it in individual cups or in a trifle dish. Here are some creative ways to present and serve your classic dirt cake.
Individual Dirt Cake Cups
For a personal touch, serve the dirt cake in individual cups. This makes it easy to serve and gives each guest their own portion. Small clear cups show off the layers of crushed Oreos, pudding, and cream cheese mixture. Dirt Cake presentation in individual cups is perfect for parties and gatherings. It’s also a great way to manage portions, ensuring everyone gets a fair share.
Trifle Dish Presentation
For a statement-making presentation, layer the dessert in a trifle dish. A clear trifle dish highlights the contrasting textures and colors of the layers. This is great for larger gatherings where presentation is key. The layers of crushed Oreos, pudding, and cream cheese mixture are showcased beautifully, topped with gummy worms for a fun finish. Trifle dishes add elegance and sophistication, making your dessert both striking and delicious.
To learn more about creating and presenting this delightful treat, check out the full recipe and guide here.
Whether you choose individual cups or a trifle dish, serving Dirt Cake can be as fun and creative as making it. Enjoy customizing your presentation to fit your event and delight your guests with this visually appealing and delectable dessert.
Storing and Freezing Dirt Cake
Keeping your Dirt Cake fresh and tasty is key. You can store it in the fridge or freezer. Here are some tips to help you store it right.
Short-term and Long-term Storage Tips
For a short time, store your Dirt Cake in the fridge. It’s best to chill it for at least an hour before serving. This lets the flavors mix well and the pudding set.
If you have leftovers, they can stay in the fridge for up to three days. Make sure to cover it tightly with plastic wrap or foil. This keeps it moist. It’s best to make the cake just a day before serving to keep the cookies crunchy.
To freeze your Dirt Cake, cover it well with plastic wrap and then put it in an airtight container. This prevents freezer burn. You can freeze it for up to two months. When you’re ready to eat it, thaw it in the fridge. The texture might change a bit, but the taste will be great.
Refrigeration vs. Freezing
Refrigeration and freezing both have their perks for storing Dirt Cake.keeps the cake fresh for a few days. It’s perfect if you plan to eat it soon. On the other hand, freezing is great for longer storage. Even if the texture changes a bit, the taste stays wonderful.
It’s important to cover your Dirt Cake well, whether you’re refrigerating or freezing it. This helps keep it fresh and tasty. By following these tips, you can always have this delicious dessert ready to go!
Tips and Tricks for the Best Dirt Cake
Making the ultimate dirt cake is all about the right techniques and creativity. We’ve got the top tips to help you make a perfect dessert every time. Whether it’s for a party or a family treat, these tips will make your dirt cake stand out.
Chilling the Cake
Chilling the cake is key to a great dirt cake. It sets the layers and brings out the flavors. Chill it for at least an hour, but 2-4 hours is even better.
This lets the pudding and cream cheese firm up. It makes slicing easier and looks better.
Using Different Pudding Flavors
Try new pudding flavors to spice up the classic dirt cake. You can use banana, chocolate, or mint pudding. These flavors add excitement while keeping the dessert’s charm.
For example, chocolate pudding with crushed Oreos is a hit with chocolate lovers.
Here’s a quick comparison of pudding flavor options and their impact:
| Pudding Flavor | Flavor Impact | Pairing Suggestions |
|---|---|---|
| Vanilla | Classic, mild | Traditional Oreos, gummy worms |
| Banana | Sweet, tropical | Vanilla wafers, fresh banana slices |
| Chocolate | Rich, intense | Extra crushed Oreos, chocolate shavings |
| Mint | Cooling, fresh | Chocolate chips, mint leaves |
By following these tips and trying different pudding flavors, your dirt cake will be delicious and unique. Remember, patience during chilling and creative flavors are the secrets. Happy baking!
Dirt Cake Recipe for Special Occasions
Dirt Cake is a fun dessert perfect for many special occasions. It’s great for birthday parties or holidays. You can customize it to fit your event’s theme. Here’s how to make your Dirt Cake special for parties and holidays.
Birthday Parties and Gatherings
For birthday parties, use bright toppings that match the celebrant’s favorite colors. Add themed decorations like edible confetti or personalized cake toppers. Serving individual cups is easy and fun for guests. A 13×9-inch dish is perfect, serving up to 18 people.
- Use two packages of instant vanilla pudding mix for a creamy base.
- Layer your cake in a 13×9-inch dish for a total area of 117 square inches.
- Chill for at least one hour before serving to achieve the optimal texture.
- Add gummy worms or candy that fits the party theme, aiming for around 16 worms.
- Decorate with seasonal toppings to make it 10 times more fun!
Seasonal and Holiday Themes
For holidays, add festive elements to your Dirt Cake. Also for Halloween, use edible eyeballs or spider rings. For winter holidays, add edible glitter and red and green toppings. Using certified gluten-free Oreos makes it safe for everyone.
- Crush a 15 ½-ounce pack of classic Oreo sandwich cookies to form the base layer.
- Mix three small boxes of instant chocolate pudding (each 3.4 ounces) with 3 cups of milk.
- Combine 8 ounces of softened cream cheese, 4 tablespoons of butter, and ⅔ cup of powdered sugar for the creamy layer.
- Fold in an 8-ounce tub of Cool Whip for added fluffiness.
- Layer the ingredients in clear plastic cups (12 to 14-ounce size) to create individual servings.
Chill the Dirt Cake for at least two hours for best results. You can make it a day ahead, but not too long to keep the cookies crunchy. Store it in an airtight container for up to three days. Dirt Cake is always a hit at parties and holidays.
Conclusion
The Classic Dirt Cake Recipe is a hit at any gathering. It’s easy to make and fun to eat. Layers of creamy fillings and Oreo cookies make it a treat for all ages.
It’s simple to prepare with ingredients like instant pudding and cream cheese. You can even add colorful gummy worms for fun. This dessert is perfect for spring, like Easter, as shown at Middle East Sector.
The guide there helps you make a great dessert. It tells you what ingredients and tools you need. It also shows how to make it step by step.
Let it chill for at least 4 hours. Whisk the pudding for 2 minutes and let it rest for 5 minutes. This makes it thick and ready to serve.
This dessert is great for any event, whether in cups or a trifle dish. You can make it gluten-free or dairy-free. Add seasonal decorations or toppings to make it your own.
Keep it in an airtight container for up to 4 days in the fridge. Or freeze it for up to 3 months. Making this dessert is a joy. Share it with your loved ones and enjoy the delight of dirt cake together.